28 January 2012

Bob and Ralph Inspecting the Midget APC

All the basic skin is on the midget APCs. Next bit is the top Hatches and other related details that haven't been decided on yet, most likely a vent or two and some stowage. The last shot is both APCs and the MAWP. 

The thing I ponder right now as I look at these shots is the need for a contrasting stage for pictures, all of the white and off white tends to wash out the models which tend to be all in white card.


27 January 2012

More Midget APC Work

Following the post on the guts of these models, here I give you the first work on the skin. The Cab with the  windscreen are done in the gross details. 

I have been pondering Names for these, Clown Car keeps coming to mind. 


Back to Basics With Ralph

I have spent most of the new year trying to figure out out which of the multitude of Ideas I started last year to work on. I figured out I wasn't happy with many of them. So it is back to joyful Styrene basics, and conversions. Here is a conversion of GZG's 6-wheeled Utility Trailer for the Mini-Mule into a APC for Rebel Mini's "Sons of Thunder" and idea I have been kicking around for a while. I am inspired by some of Niklas Jansson's Art from the StarSword section of his website ANDROID ARTS, StarSword is his hommage to 40k. In the picture indicated it is the Squarish APC thumbnail.

In the Picture series we have Bob's cousin Ralph standing in as our Standard 15mm figure (note the base he is on is a 1.5mm thick 15mm round from Litko and he like Bob are left over from GZG's Assault Team pack.) and a leader figure from the "Sons of Thunder" infantry pack (Well, his base is a penny. I am slowly standardizing my core basing to pennies, which are cheaper than bought bases, and just a bit under 20mm in diameter).

The Vehicle (actually two Identical builds) is shown here being bulked up with pre-scribed Evergreen sheet and then sheeted with bits of the same. The next step is to clean-up the over hangs and joins in preparation for the detail layers. Clean-up consists of trimming down to the core desired shape then using a little of Squadron Green to fill any gaps. Followed with a rough sanding to even out the core shape. 

I use pre-scribed sheet as my base material in that it is fast to do core shape build up with it. Evergreen's "Sidewalk" comes in 1/8" through 1/2" increments, so each layer can be roughed out quickly with just a few snaps, with minmal tool work each layer. Sheet thickness is approx. 1mm and 3 layers is a approx. 1/8" thick. So in the core build resolution is generally 1/8" square pixel. Tools used here are fingers, clippers, Xacto knife, straight hemostats and generally a bit of emory board.

Choice of model was mostly the failure of another project, I got the Mini-Mule, the two trailers and a Wheeled MAWP to build a starport armed baggage train. It sounded neater than it looked. after a year of sitting on the paint desk in failure mode, the new idea struck. The MAWP will stay as-is, the Mini-Mule will get it's conversion once the APCs detail shapes are finalized.


30 December 2011

Wasteland Terrain

I have been playing Wasteland Empire on Facebook, and I have had a little inspiration.

A cistern/well to provide you wasteland Community with water. A pill bottle and a couple of desiccant containers and some wood shapes.


A coupe of woodblock houses.... still in need of doors, windows and siding....


24 December 2011

Tribal Pringles Can Terrain and project review.

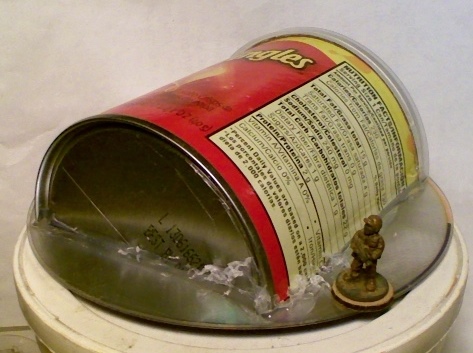
Well shopping for mass to fill the void that is the Boys hunger i cam across a flat of lunch sized Pringles cans (Ok, I ate some too...). I had been pondering Tribal dwellings (see the second picture) and well the cans sparked an idea (and Ideas around here are pretty common, from the numbers of started projects). 


A page from the sketch book. A lot of bad ideas start out here, and as I work in sculpture it never has really been burning desire to post the cartoons I work from. 


Here is your basic Quonset hut, which one of the can split in half With the lid (also in half) hot glued in place at the other end. Heavy Duty scissors are fine for cutting the side-walls of the can, tinsnips for the top rim and the metal bottom. 


Then a little Hot glue to attach it to a Old CD as a base. Details will follow, thinking I might enlist the Boy in detailing, he is alway after me for more.....


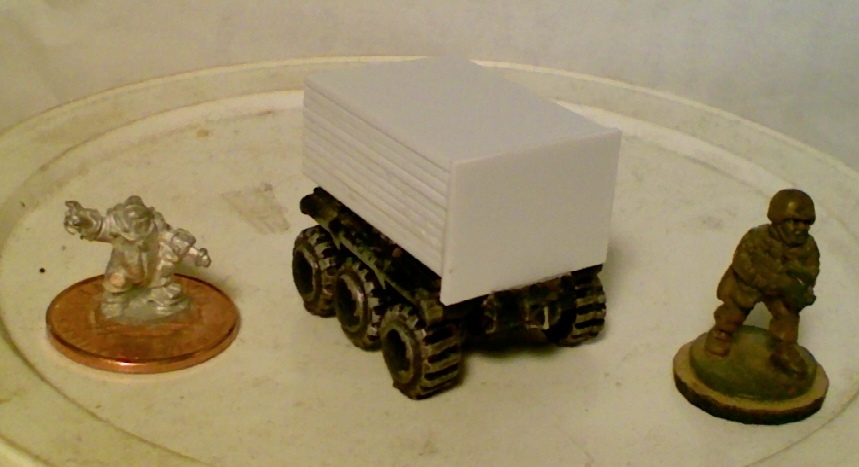
Lastly we have a brief introduction of the Crowd, these are a bunch of pawns I picked up at a local game shop for a game idea. They are glued to clear 15mm rounds, and the final step is to number/letter code the bottom. The Idea is that the players need to find specific individuals in a crowd. I was just going to paint a mess of left-over figures dark gray and give them a heavy white drybrush... Then I saw the Pawns.....


In other News I am not quitting the NueSpeeder Project, I am putting it on the side board while I go back to other projects. More wheels I think and the related vehicles, and I have a mess of plastic tanks and other armor to finish. And my poor Alien Mercenaries and Mutants are jones-ing for their rides...

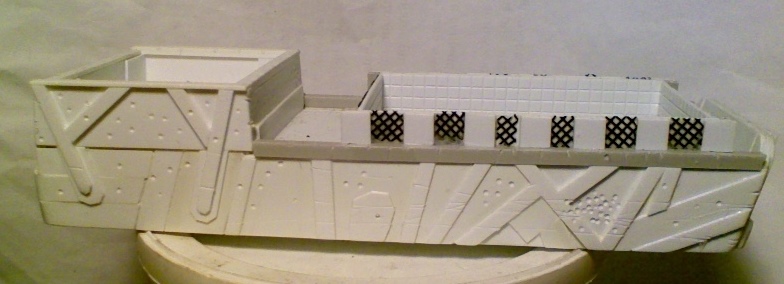
And I just realized I have a week to finish the following..... Tango Boat of the Apocalypse, it was started as a part of a building contest on the forum Post Apoc Wargames. The Pilot house needs it upper and and the well needs its roof, an am contemplating a couple of side mounted Flamethrowers and/or gun mounts....


17 December 2011

Bob and a Machine Coalition Skimmer

Ok this is a example of fiddling while I am watching a movie on the computer. All of this is straight out of my various bits bins, mostly the wooden shapes bucket. Michels frequently puts all their wood bits on sale, when I catch one I buy all the interesting ones I find, mostly cubes (with a little paint instant cargo). The metal bits are from the Maatac line of tanks now by Monday Knight Productions, who at conventions have a large chunk of their lines out in bins where one can buy bits by the ounce. Add a handy big bottle of Aleene's and things happen. 


04 December 2011

Argh! Detail.....

Well is the 1st nearly done Of this project, this my Homage to the SavannaMaster.


Things that I have learned with this project so far.
  • Have a stronger plan. Basic form. Detail, etc... 
  • Smaller details eat up far more time than the gross form.
  • A quick casting system would be very nice. Thinking silicone putty molds like Mold Putty from Alumilite.
  • Maybe a series of parts is the best path.
  • Magic Sculpt needs to set some before working details.
Those are my short list if discoveries, I think I need a specific sketch/workbook for these related projects. I would just use my iPad, but if you saw how dirty my fingers got paper is so much better.