30 December 2011

Wasteland Terrain

I have been playing Wasteland Empire on Facebook, and I have had a little inspiration.

A cistern/well to provide you wasteland Community with water. A pill bottle and a couple of desiccant containers and some wood shapes.


A coupe of woodblock houses.... still in need of doors, windows and siding....


24 December 2011

Tribal Pringles Can Terrain and project review.

Well shopping for mass to fill the void that is the Boys hunger i cam across a flat of lunch sized Pringles cans (Ok, I ate some too...). I had been pondering Tribal dwellings (see the second picture) and well the cans sparked an idea (and Ideas around here are pretty common, from the numbers of started projects). 


A page from the sketch book. A lot of bad ideas start out here, and as I work in sculpture it never has really been burning desire to post the cartoons I work from. 


Here is your basic Quonset hut, which one of the can split in half With the lid (also in half) hot glued in place at the other end. Heavy Duty scissors are fine for cutting the side-walls of the can, tinsnips for the top rim and the metal bottom. 


Then a little Hot glue to attach it to a Old CD as a base. Details will follow, thinking I might enlist the Boy in detailing, he is alway after me for more.....


Lastly we have a brief introduction of the Crowd, these are a bunch of pawns I picked up at a local game shop for a game idea. They are glued to clear 15mm rounds, and the final step is to number/letter code the bottom. The Idea is that the players need to find specific individuals in a crowd. I was just going to paint a mess of left-over figures dark gray and give them a heavy white drybrush... Then I saw the Pawns.....


In other News I am not quitting the NueSpeeder Project, I am putting it on the side board while I go back to other projects. More wheels I think and the related vehicles, and I have a mess of plastic tanks and other armor to finish. And my poor Alien Mercenaries and Mutants are jones-ing for their rides...

And I just realized I have a week to finish the following..... Tango Boat of the Apocalypse, it was started as a part of a building contest on the forum Post Apoc Wargames. The Pilot house needs it upper and and the well needs its roof, an am contemplating a couple of side mounted Flamethrowers and/or gun mounts....


17 December 2011

Bob and a Machine Coalition Skimmer

Ok this is a example of fiddling while I am watching a movie on the computer. All of this is straight out of my various bits bins, mostly the wooden shapes bucket. Michels frequently puts all their wood bits on sale, when I catch one I buy all the interesting ones I find, mostly cubes (with a little paint instant cargo). The metal bits are from the Maatac line of tanks now by Monday Knight Productions, who at conventions have a large chunk of their lines out in bins where one can buy bits by the ounce. Add a handy big bottle of Aleene's and things happen. 


04 December 2011

Argh! Detail.....

Well is the 1st nearly done Of this project, this my Homage to the SavannaMaster.


Things that I have learned with this project so far.
  • Have a stronger plan. Basic form. Detail, etc... 
  • Smaller details eat up far more time than the gross form.
  • A quick casting system would be very nice. Thinking silicone putty molds like Mold Putty from Alumilite.
  • Maybe a series of parts is the best path.
  • Magic Sculpt needs to set some before working details.
Those are my short list if discoveries, I think I need a specific sketch/workbook for these related projects. I would just use my iPad, but if you saw how dirty my fingers got paper is so much better.

23 November 2011

Words, excuses and more words....

Ok I have a whole passel of detail stage models here on the worktable, and I am stuck. Well not really stuck, I was going to build all the weapons and what-not up from scratch, but that process is SLOW very slow.... So I am going to dig into the bits collection and finish them out like that.

Other than that i am finishing up a couple of income projects that have sucked up more time than I billed, only to have the payee push back both the due date and payment date to the 1st of the year. So once the T-day cooking is done I am free until 1st of the year. But, it still is the Time/Money equation.

To top off all that off, tons of new Bad Ideas....

01 November 2011

Yet Another NeuSpeeder Upadate

Ok the first three are off the stands and in the final phase, which is adding the surface details. While the core details are done here it might take several applications of putty to get the detail right. Bob and one of GZG's Wheeled MAWP with tribarrel autocannon are in each pic for scaling purposes (Yes, I know that they need better paint jobs).

Ok this one is pretty speeder like with the aircraft kind of canopy. The plan is to add a in-body forward fixed mount on the left side next to the canopy (the green oblong, next to the blue canopy blob in the lower picture). Behind and to the right of the Canopy I am going to mount a multicell launcher (I haven't figured out what it looks like yet).


This one I have been referring to has the Floating Brick, I like how it is progressing, the yellow band will become a recessed windscreen, armament is yet to be decided, though I am leaning towards a Mecha arm sorta arraignment hanging out from the lugs...


This last one is a hommage to Battletech's Savannah Master, hoards of them I have used over the years to eat other peoples mechs..... Tiny hockey puck with a big laser.... What could be better?


The steps here are cleaning up the attachment point to the stand. Figuring out how to loft the figure on the table in a obtrusive mannor (I really don't like basing vehicles) And weapons, there are two schools of thought about this, the purest is I make the bits myself, the other is what is commonly available i.e. kit-bashing....

28 October 2011

NeuSpeeder Detailed Update

Ok, a quick recap of the NeuSpeeder Project; the base idea is automobile scaled armored LandSpeeders  that trade with the walled Fortress Towns of the Post Apocalypse Wastelands. The core trope is CarWars with LandSpeeders. This group is all generally supposed to be car sized. There plans for truck and bus sized speeders as well as SpeederBikes both open and enclosed when I have gotten a firmer handle on the shapes.

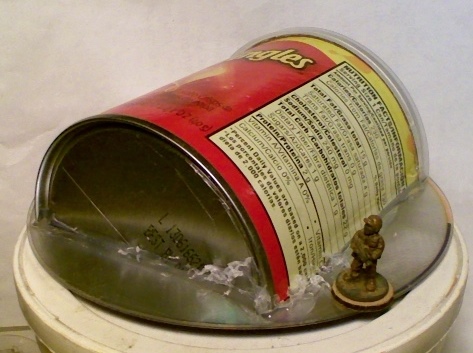
Base construction consistes of taking a appropriately sized wad of Magic Sculpt (I get my supply from Tap Plastics as they have several local stores), and applying it to sculpting stand. The stands I am using are just recycled soda bottle caps rescued from the recycling bin. Then I do a rough shaping to said wad with my fingers to get it into an approximately auto-ish shape. I tend to go a little wild in this phase and work up a lot of teardrop or ellipsoid shapes because I can always go back an bulk out shapes that don't cut the grade when the next layer or two is applied. The last step in this phase, and every phase is after the Magic Sculpt cures a liberal sanding with a course grade sponge cored sanding block, this roughs up the surface for the next layers and also allows basic refinement of the core shape. I clean up after sanding by throughly brushing the piece with a stiff-ish brush and a wipe down with a Isopropyl Alcohol saturated paper towel.

The next phase is the bulk out. Here is where the final shape is defined in little steps. Each shape or step is applied with a different color of Magic Sculpt, which gives better contrast than the basic translucent off-white that is the core color of Magic Sculpt. This stage uses more tools than just my fingers, mostly reshaped popsicle sticks. I prefer wood tools as if you let them soak in a jar of water, that way the Magic Sculpt doesn't stick to them, very much. Note, Magic Sculpt thins and softens with the addition of water. so when working with damp tools it is a good idea keep a few paper towels handy. While this phase is about building up to and finalizing the core shape, the detail/surface layer is still to come. Sanding uses more tools beyond the basic corse sponge cored sanding block, I have found cheap emory boards in various grades work well for refinement. Coloring the Magic Sculpt is accomplished by add a little bit of Paste Pigment after the two parts have been throughly mixed. I generally use a little bit of barrier coat on my hands while I am working with the putty. If you have any sensitivity to epoxies gloves are advised. 

This one is done up as a test of concept "Tank Destroyer" / Turret-less tank.


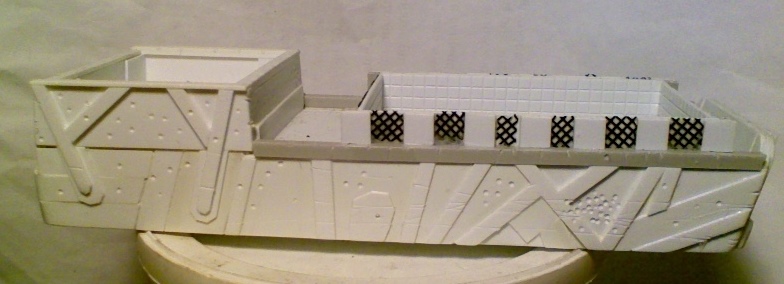
Proto Service Body Pickup.


This one I am thinking just needs detail work.


Micro Bus


Another Tank concept


These are the tools used so far. Shaped Popsicle Sticks and Clay/Color Shapers. 

Sponge cored Sanding blocks in various grades. 

Various colors of paste Pigment. (Gray, Black, Red, Blue, Yellow and Brown, this way I can mix up to nearly any shade) 

General thought at this point in the project are than maybe using another material as the core might be an idea. I am thinking maybe balsa wood, something realativly malleable and fast to put up. The other idea in maybe a composite of puttyies for the outer layers, as a 50/50 mix of Greenstuff and Magic Sculpt has far different handling characteristics than straight Magic Sculpt.


27 October 2011

NeuSpeeder's next Layers

Ok, first off Found Bob! So we have our Scale guy back. 

In these two pictures we see two layers and some paste-up with wooden craft rectangles and hot glue. In the top picture you can see complete revision of a core shape of one of these vehicles (the mostly gray one). The bottom picture you can see the addition to the core with the addition of craft shapes with hot glue, I did this give a more angular core shape. I could have done the addition with putty, but the hot glue gun was just sitting there and mixed media seemed like an idea.


I have a bunch of newer work to show off from the last couple of sessions, just have to shoot pictures. I also am pondering the construction of light vehicular weapons. While for these I will probably dig into the bits bin, I have a bunch of old Mech bits kicking around. And have been pondering some the current lines of Mech figures that I can purchase bits for (both Reaper's CAV line and IWM Battletech lines have bits available).

More laters,
Evyn...

17 October 2011

NeuSpeeder Update

Ok, a quick, mostly pictorial update. Here is the some more bulking out of the basic shapes, tonight I was concentration on the passenger areas, making sure there is enough under-volume. The next step is another round of sanding and then some more secondary bulking out in preparation for the detail layers.

The materials so far are Magic Sculpt and paste pigment. Tools are fingers, sandpaper, sponge cored sanding blocks, files, and various Dremel bits, mostly sanding drums.


Oh! Bob has gone walkabout recently, so I need to find a new comparison figure.